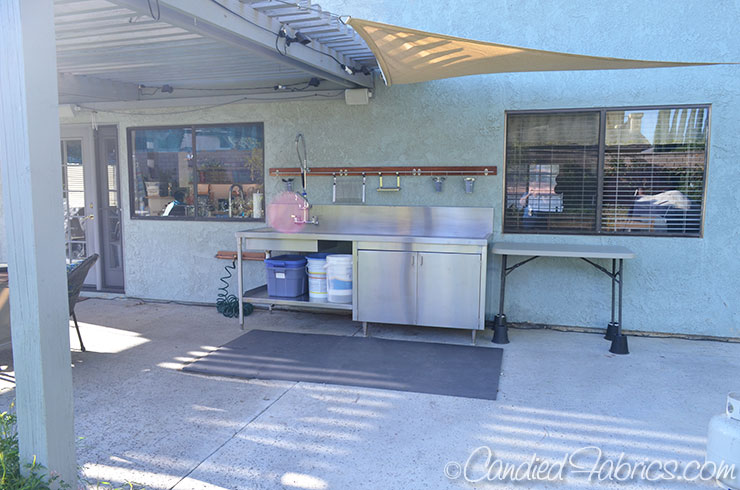
Introducing….my Custom Dyeing Sink! It sits on my back patio, centered between the 2 windows, left is our kitchen, right our music/dining room, this is 8 feet of stainless steel awesome:
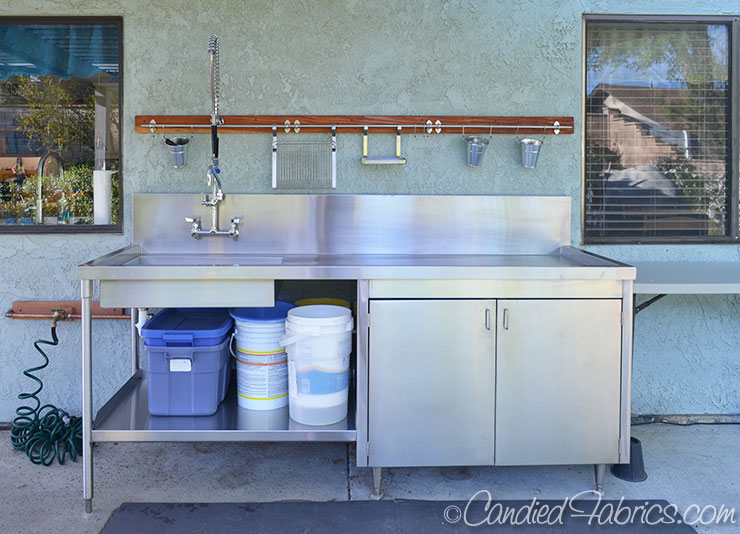
This awesome thing was designed by me, along with the help of JNL Stainless, a stainless steel manufacturer located about 30 miles from Redlands. When I described what I wanted and how I would use it, they made some great suggestions that make it totally awesome!
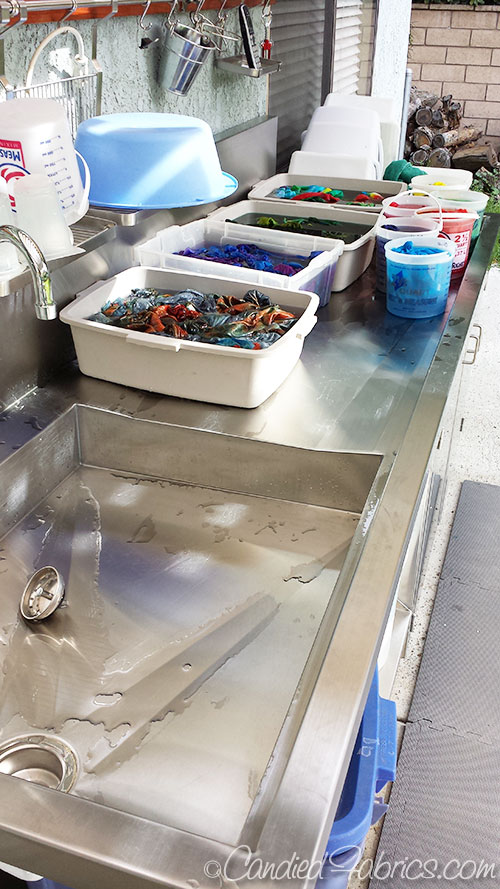
There is a raised edge all around the counter, so any spills will always be directed to the sink
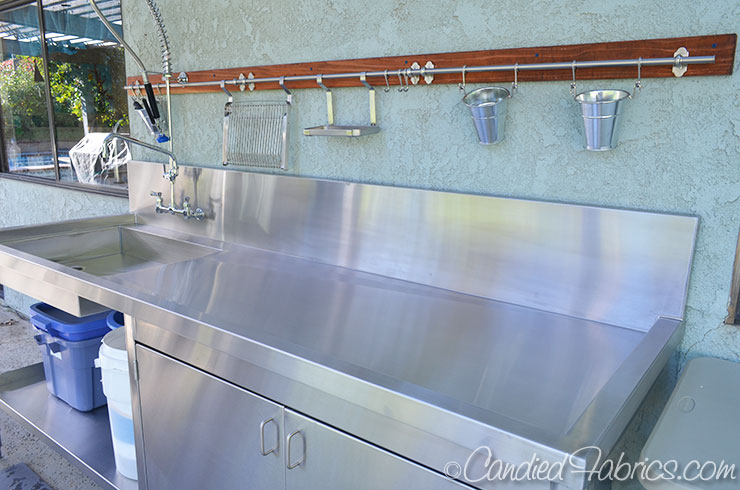
The whole work surface has a slight drainboard built in, assuring everything drains to the huge sink:
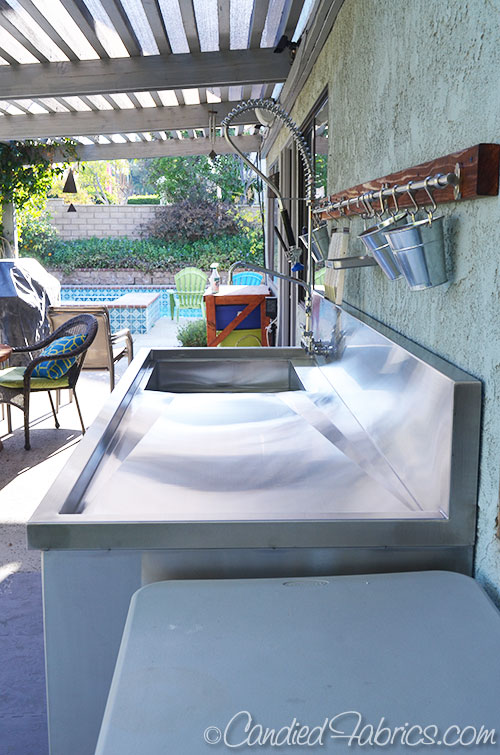
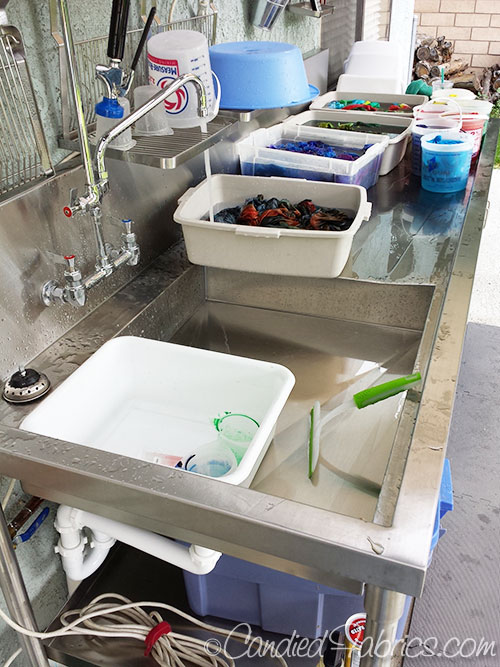
The sink, although it’s huge, is very shallow, so I can work within the sink if I want, and when I’m rinsing out fabric I won’t be leaning over and killing my back:
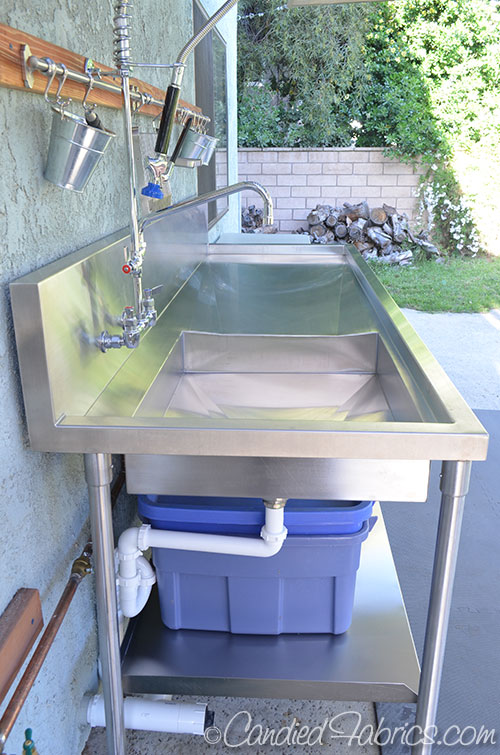
I’m not at all worried that the containers I dye in won’t fit under the faucet with that shallow sink because I’ve got a humdinger of a faucet! It’s a commercial kitchen faucet with a regular faucet that’s high off the deck and the pre-rinse pull down that is perfect for easily rinsing off the entire worksurface:

I ask the guys to put the drain in the back, so I could be rinsing out a dishpan of dyed fabric and not be covering the drain. I originally imagined it being in the far back, but they told me it would be better to be in the center off to the side, making the plumbing easier to install:
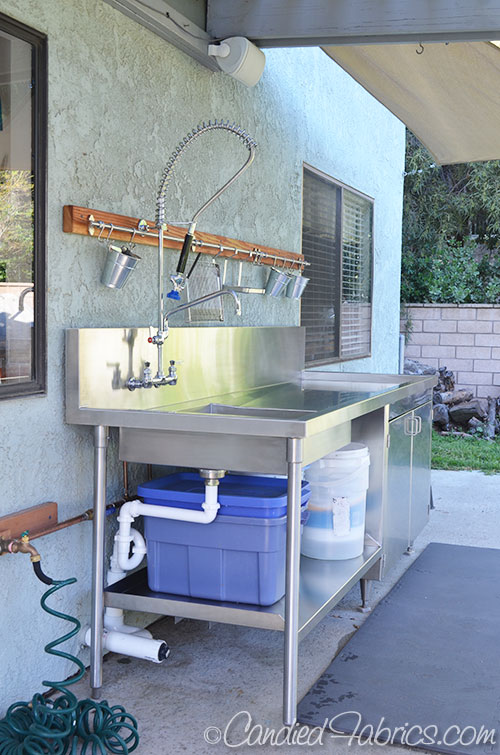
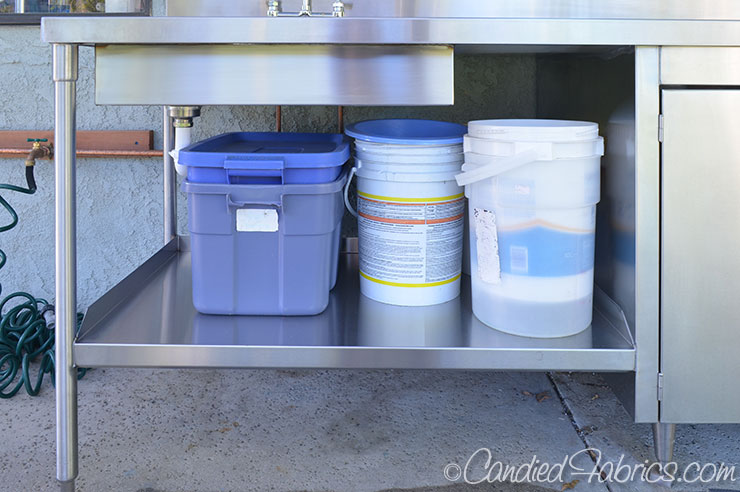
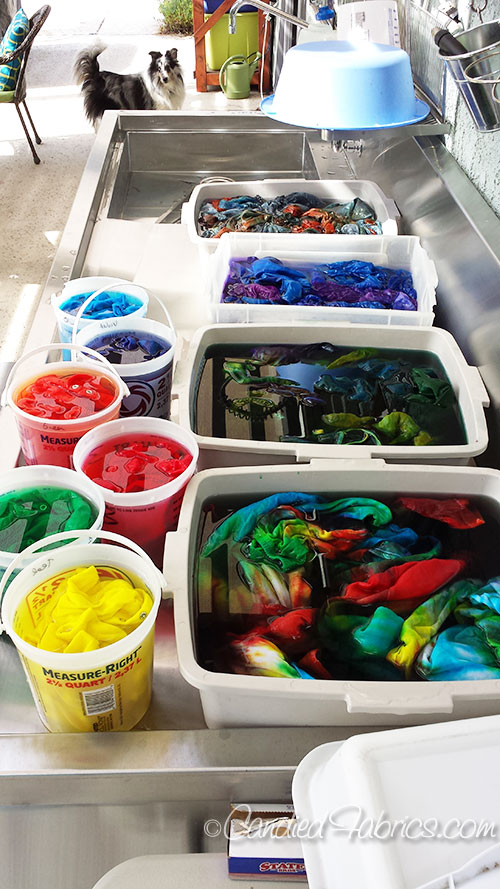
Because the plumbings off to the side, I’ve got room on the open side for all my big soaking buckets:
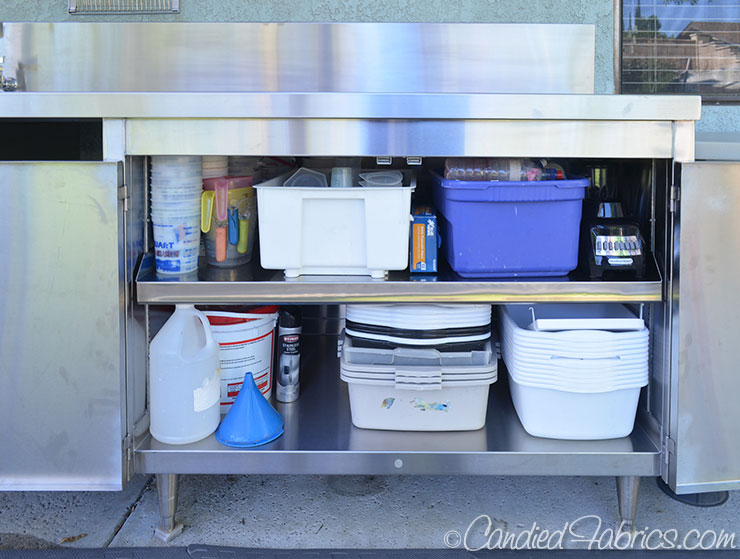
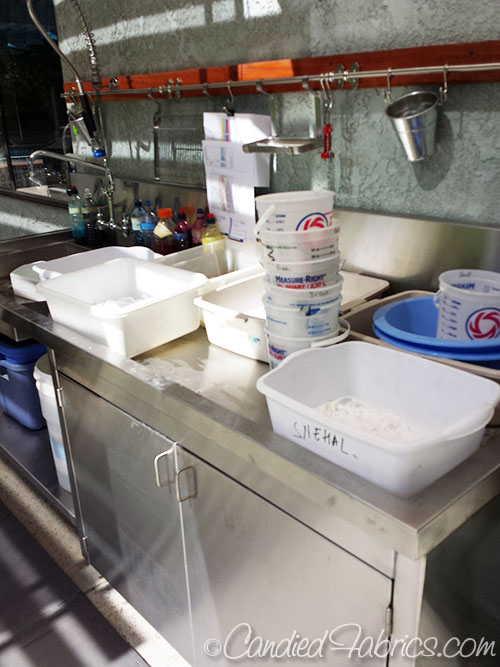
And on the other side is SO much storage! The cabinet is so deep that there’s 2 layers of stuff down there, the things I don’t use very often are in the back row:
It’s just fabulous! I finally got to dye over the weekend and break it in! Here’s a few snaps during the dyeing:

My old sink used to be in front of the kitchen window, so I would tape my dyeing spreadsheets. Now, I clip them onto the Ikea Fintorp rail we’ve installed above the sink. (The faucet needed to have a support screwed to the wall, hubby wanted to do a small strip of wood behind it as it would make the faucent support more secure – I suggested extending it all the way across for the railing, and it’s working great!)
And the rinsing out is super easy now!
That folding down dish drainer that works with the Ikea hanging rails works so well for drying small cups, graduated cylinders etc… that I went back to Ikea Saturday night to buy 2 more!

I really enjoyed working on it…it’s so awesome!!!!
9 Responses
I am so happy for you. I know how much more efficient and ergonomic this must be. Not to mention it is gorgeous! 😀 Congratulations!
Thanks Laine! Indeed, it IS gorgeous!!!!
Thanks so much for posting. I enjoyed seeing it and understanding the whys. I love the lip. This was great for me to think what I would need. I think flat might be better because I use a lot of silk screens.
Yep, that slight drainboard would indeed be a problem if you needed flatness like for silk screening. As long as you remembered to squeegee any excess water into the sink at the end of each session that wouldn’t be a problem, I find myself squeegeeing anyway because the drain tilt is so slight it takes awhile for the water to actually run down the incline.
Congratulations and thanks so much for the nice photos.It looks so different from your old one.I expect your new class soon.Happy dyeing!!!!!!
Thanks I love it! And indeed, I’m wrapping my brain around getting the silk dyeing class together. While dyeing this weekend I was thinking about how I’d film, etc… 🙂
It’s the best dyeing sink EVER!!
I know! If you ever think you want to design your own, feel free to touch base with me, there’s a couple things that at first try I think I’d do differently if I ever do this again. And I’m sure I’ll have more thoughts after I use it a bunch!
Lucky you. It is awesome. I can hardly wait to see your creations. You are one of the most talented artist I have seen. Happy Dying.