Here’s the final week in Vicki Welsh’s REAL Studio Tour.

This week it’s about showing our studios in action, with all the chaos etc involved! Come on it!!!!
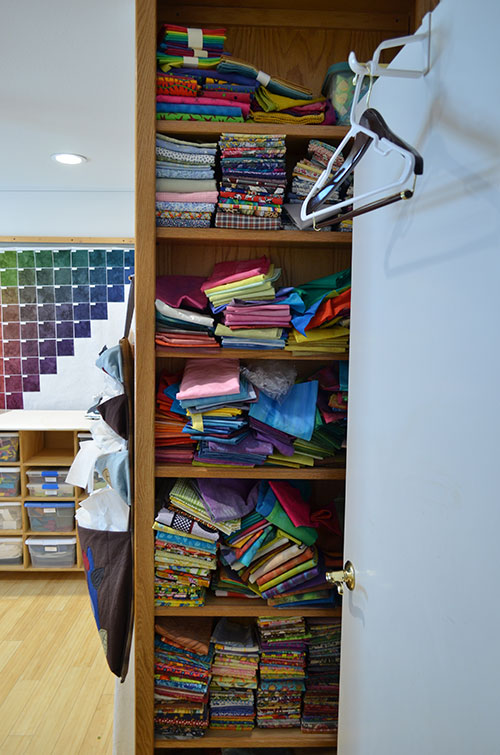
When you open the door, there is a floor to ceiling bookshelf (built in before we bought the house) that years ago I carefully filled with fabric folded to fit it. As you can see, my hand dyed fabric is all colly-wobble, bot those shelves of commercial fabric have not been touched!!!
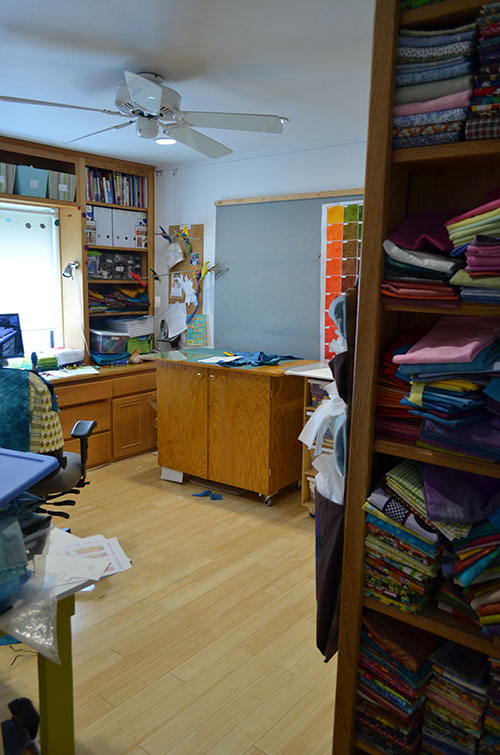
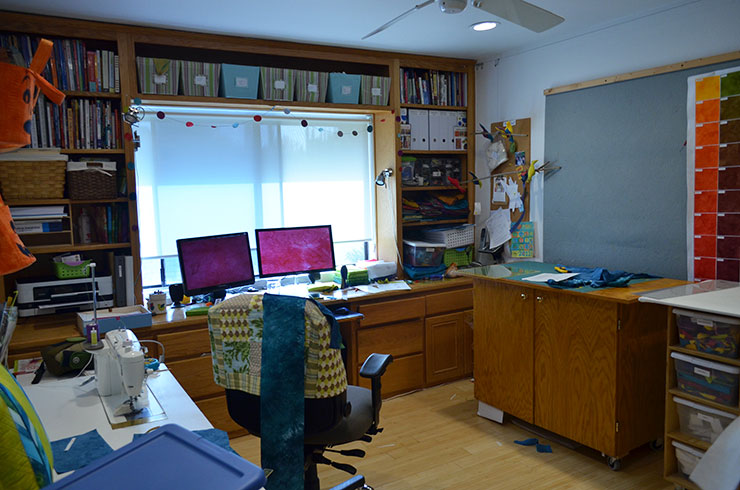
Turn slightly to the left and you can see the chaos continues! That built in desk around the windows was also built in by the previous owners. Everything else in this room, from the low heat, very bright LED can lights to the floor to all the furniture except the rolling chair, was made for/installed by my most awesome hubby!
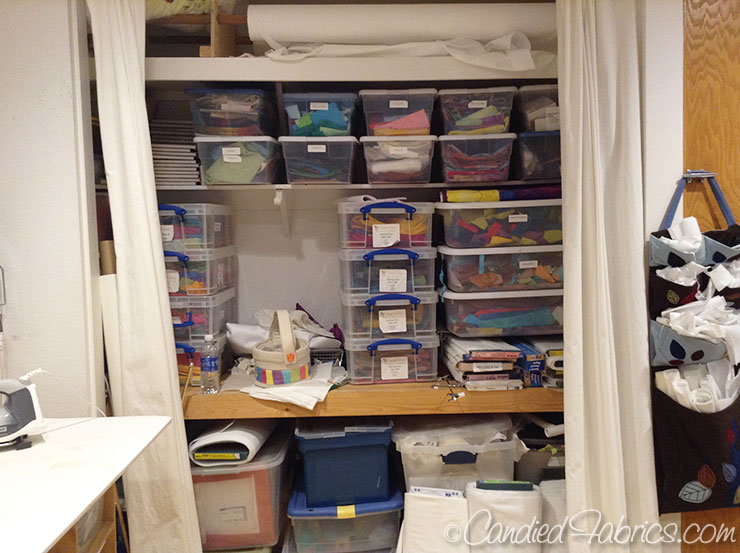
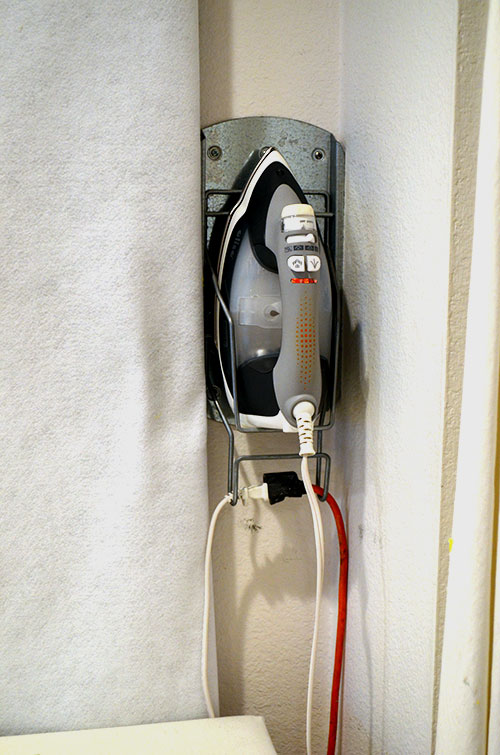
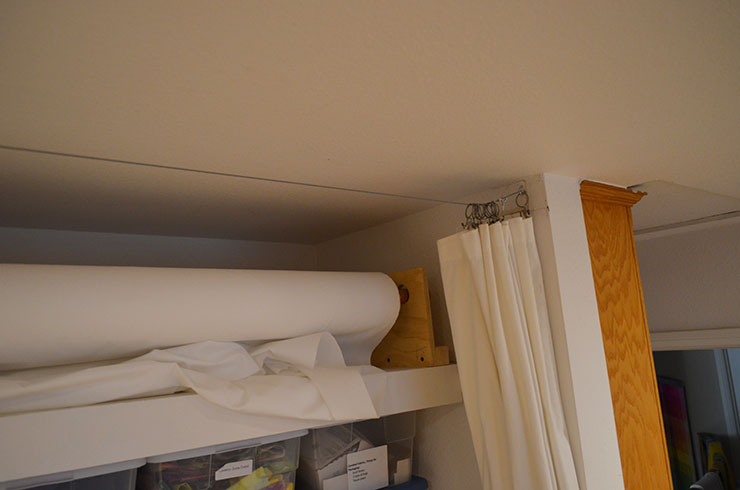
On your right as you enter the room is a closet that I removed the sliding doors and replaced with white fabric curtains. That clear-ish space in the center is where I land the iron when I’m ironing wide, big pieces of fabric. I have one of those Oliso irons that you don’t have to rest on its heel. A couple of years ago I really hurt my shoulder sleeping wrong and then doing something stupid (I don’t remember now…) and the act of rotating that iron really really hurt, so I got the iron in hopes it would help. It did, the shoulder pain cleared up, and I’ve used it ever since. Now, I’m dangerous using a regular iron, I tend to leave it in the ironing position, YIKES!
When I’m not actively ironing, this 3$ iron holder from Ikea holds it safe and away from falling.

I love this thing, because not only does it keep the iron from getting knocked over, but I drape the cord on the wire part meant to hold an ironing board, this makes it a lot harder to trip over the cord! My dream studio has plugs for the iron up high, but until then this does the trick.
A few of you noticed that I keep a roll (actually, there are 2, one behind the other) of PFD fabric up in the top of the closet. I LOVE this setup, it’s a perfect solution for a space that isn’t that useful for day to day storage. I took some pix so you could see how it works. The rods are wooden closet rods, the holders are 1/2″ plywood screwed into a 2×2. The slots on the left are so the rods can be lifted in and out to change the roll:
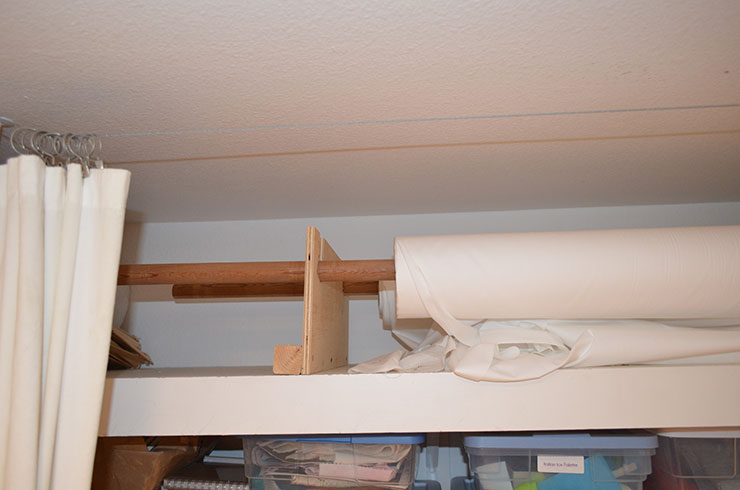
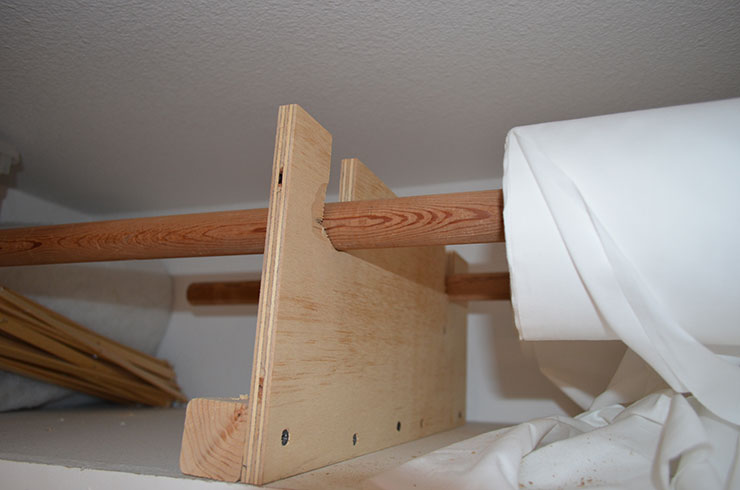
And the other side just has a hole drilled in it. I do need hubby or my 16 year old to change the rolls, but use is so simple, I just pull the fabric down, measure, snip and rip. Then I tuck what was leftover underneath the roll til next time!
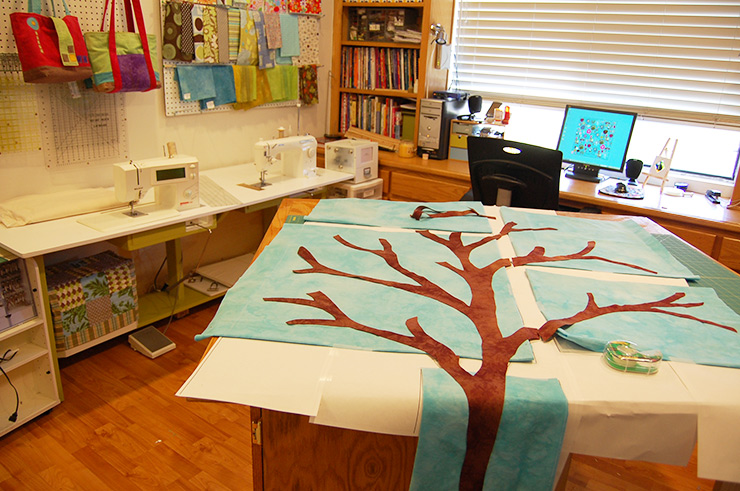
I already talked about my awesome ironing/fabric storage cart last week. Here’s the ironing board in action, laying out and pressing fleece/interfacing to pieces for a bag I was making.
The cabinet to the left of the ironing board is my main cutting surface. I love that it’s right next to my ironing surface, such a great work flow!
The table can fold open to be twice as big when I need more layout space. It makes it very hard to manuever around the room, but useful when I need it! Here’s an OLD pic of the studio showing it in use:
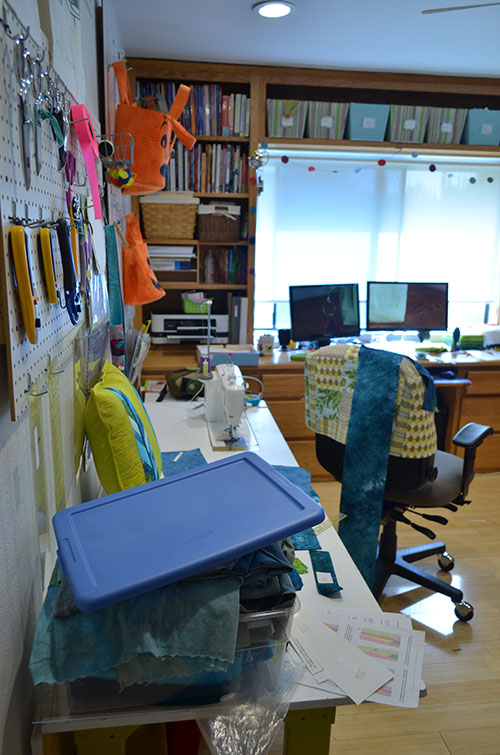
Here’s reality 3 days ago! The chair is often used to drape fabric I’m going to use in the current piece.

The pegboard on the right here holds random things, right now it’s my trick or treat bags I made for Quilting Arts Gifts. I’ve got to find a home for them! The pegboard on the left holds all my scissors, rotary cutters and ruler. The cabinet to the left of the sewing machine holds all my thread, that was a major reorganizing project and I am so glad I did it, it works great! The table is made to hold both my sewing machines, you can see that in the picture above, but most of the time, my Bernina lives underneath the table so that I can use that space to spread things out while sewing.

I’ve got a few more things to make before Christmas, and then after the holidays, I feel a major clean, purge and switcharoo coming on! I love my space, but there’s only so much room, I need to make sure that the things I’m using are actually accessible. (Commercial fabric, I’m looking at you!)
9 Responses
I love that wall of storage on the window wall.
What a great idea for holding your rolls of fabric!
Thanks for sharing the info on the iron holder. Very funny about the neat stacks of commercial fabric. I’m on a mission to use more of mine (mixed with hand dyes) because I need to get rid of it.
Thanks for inviting us in!
Thanks for sharing your space. Love that iron holder. Sounds like a great idea.
Love seeing your space. A couple of questions: What is stored in the bins high up, above the window? And are you using a Juki for your main machine? If so, what model, and do you like it? Thanks!
The bins overhead basically hold pieces from projects that I put on hold. But I haven’t touched them in a long time now, so I should probably re-think what’s up there…whatever does go up there needs to be light as I can barely reach the bins, and would not want to have something crash down on my head.
I wrote a whole post about my Juki TL-98Q here: https://www.candiedfabrics.com/2013/10/13/my-juki-tl-98-q/
I love it!
you have a great set up in there and with the furniture on wheels, it is easy to reconfigure.
Wow! Beautiful hand dyes! And all that PFD fabric, assuming you do a lot of dying. Nice layout for your studio.
what a creative space.
LeeAnna Paylor
lapaylor.blogspot.com