Well, we’re almost done! I really can’t believe it! We’ve had a great time using the kitchen…several times I’ve been doing something at the counter and I’ll think “I wish I had some light” and VOILA! I can turn on the under the counter lights and see! 🙂
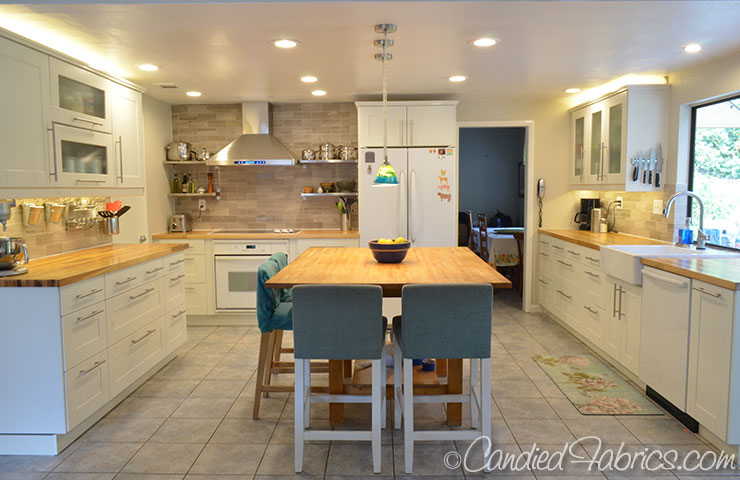
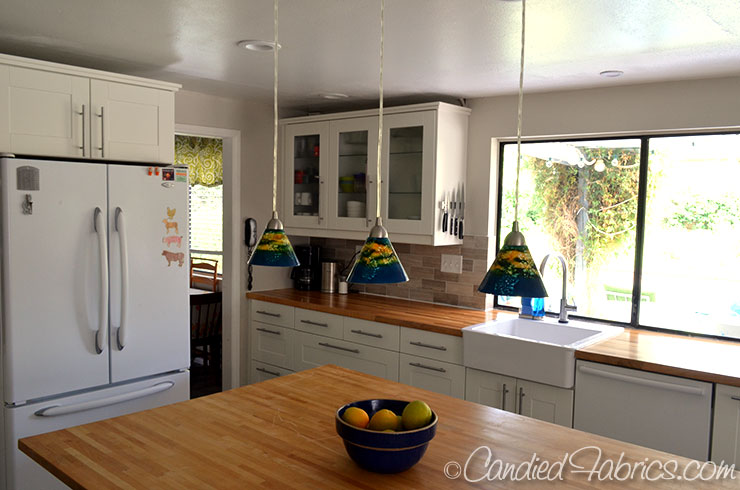
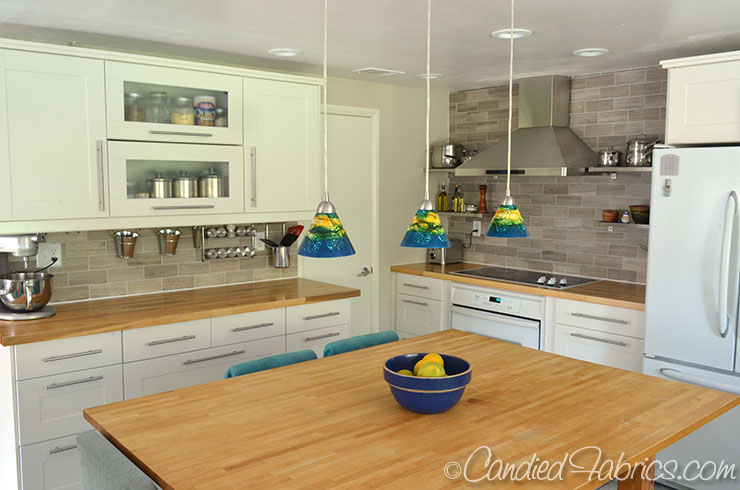
A couple of my friends have asked where all the color is! Well, you know how important color is to me, and I know that my color loves can change over time…which is why the very hard to change elements are in this neutral palette. I love these pendant lights, with all the blue and teals, and I’m creating a palette with a range of blues and chartreuse! Andrew’s building the island, so I’ll be painting the base chartreuse! But who knows, in 3 years I may want to paint it red! It’ll still look good with all white, grey and wood!
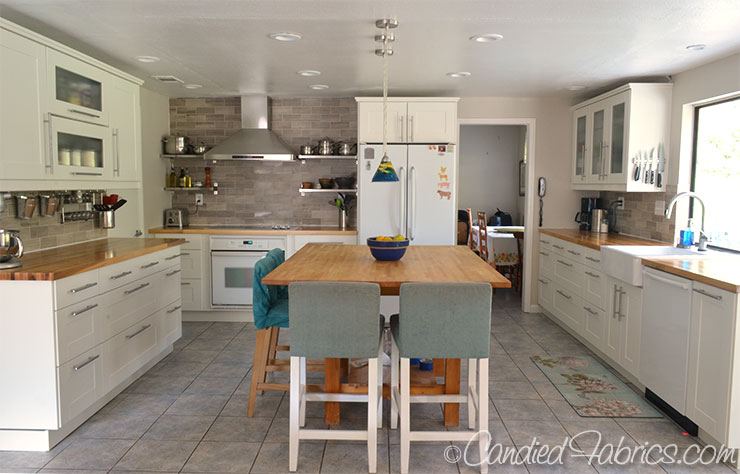
One of the changes we had to make during construction was the location of that cabinet that’s on the right side of the dishwasher – in the original plan it was going to be just to the left of the sink. Well, I am SO GLAD we moved it to the right side of the dishwasher! It makes the dishwasher even quieter than when it was on the end of the run. But more importantly, that space just to the left of the sink is Andrew’s prep area and the cabinets just to the left of the sink hold the big stainless steel bowls he uses ALL the time as well as the colandars and salad spinner. Having them right by the sink makes is essential. And the cabinet that ended to the right of the dishwasher has the dishtowels, if they’d been located right in Andrew’s main prep area we would ALWAYS be asking him to move while we get them. Located there at the end of the run makes them accessible to everyone!
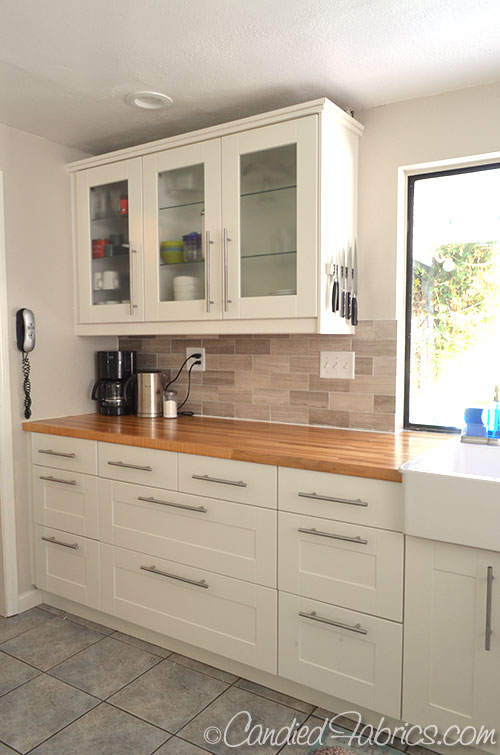
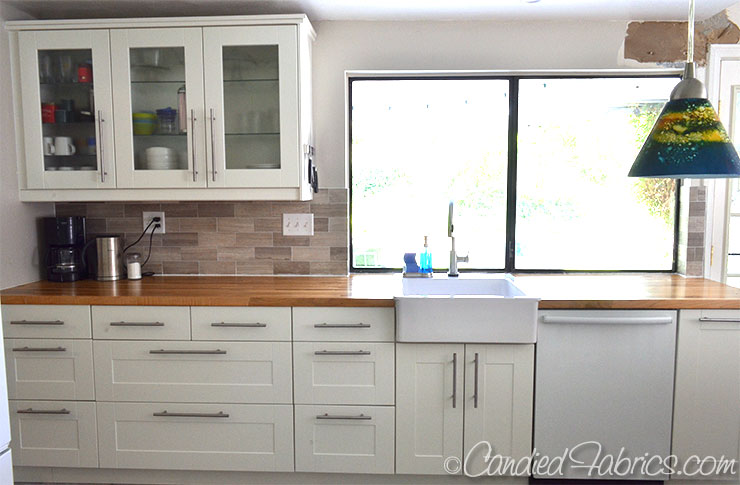
Funny, we had the same coffee maker and electric kettle on this counter before the renovation, and it seemed like a lot of clutter! Now, it doesn’t! Perhaps it’s because we moved the knife bar – it used to be on the backsplash and now a new shorter one is on the end of the cabinet. I really like this change!

One close call we had was with the Kitchen Aid. It’s the big model, with a 575 watt motor that you crank the bowl up and down to use. Well, it’s taller than the light rail! Boy did I have a heart attack when I put it on the counter! It fits under the cabinets just fine, but I have to tilt it to get it under the light rail. It will have remain in this angled position, which I actually don’t mind. And when we want to use one of the attachments that screw on to the front, we’ll have to bring it forward under the rail and use it on the front of the counter. Again, not a big deal…but man, did my eyes cross when I discovered this!!!!
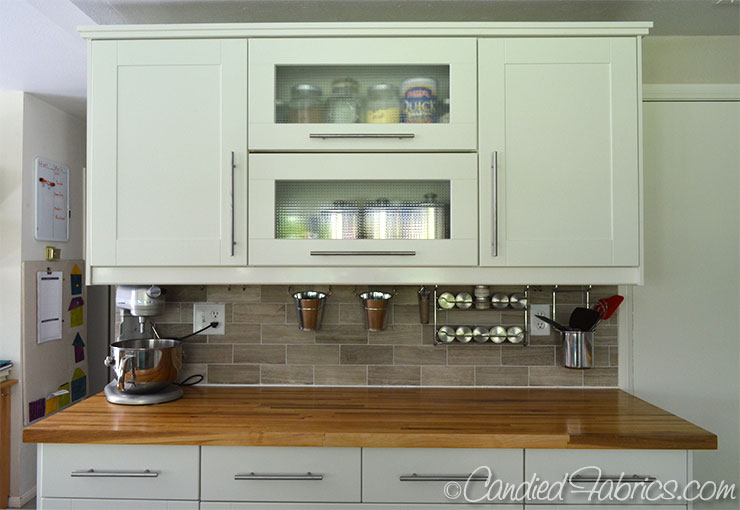
I’ve had the hanging spice rack and hanging tool canister hanging in the pantry since we moved here. I am so happy that Ikea’s Fintorp rails work so well with them! I bought a few of those cute hanging buckets from Ikea just because they’re cute…right now, they don’t hold anything, because I’ve got space for everything! I’ll see whether I’ll use them or not…
Another change in the plan was the location of these 2 cabinets on either side of the stove due to where we could and couldn’t install the new hood. Because there has to be a 2″ spacer at the left most side of the run so the drawers can clear the pantry door jamb, that 2″ helps balance the smaller cabinet (so the way it is, there’s 20″ on the left and 24″ on the right). If the bigger one had been on that side, there would have been a really big size difference: 26″ on the left and 18″ on the right. I think having the hood that much off center would have really disturbed me! Of course, I’d love to have it completely centered, but that would require something custom. Not in the budget!
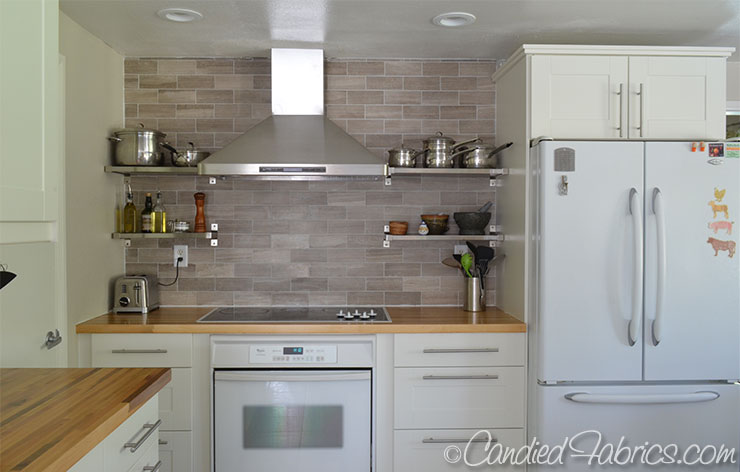
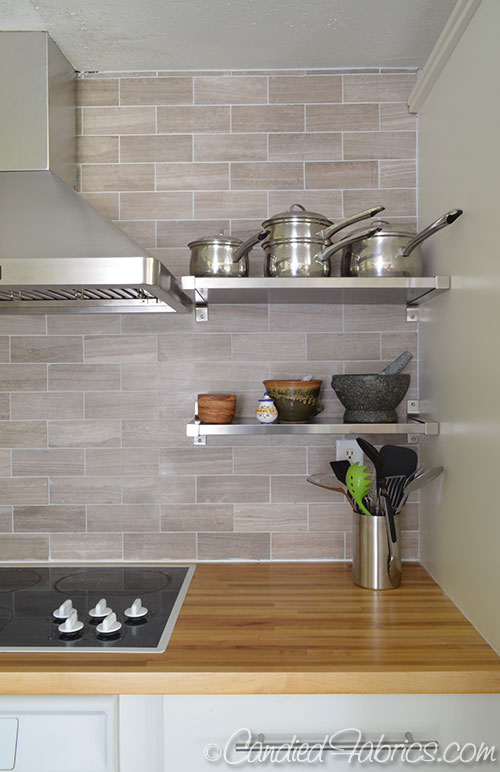
Although it was EXTREMELY nerve wracking when Andrew was drilling massive holes in our beautiful new limestone tiled backsplash, I love the result! Just the things that we use all the time around the stove, completely accessible! This came about because Andrew doesn’t really like the look of cabinets around a big hood like this one (neither do I, come to think of it!) But since all that extra tile meant extra work from us and expense, I was really glad that it was hubby who said “I don’t like those cabinets, what else can we do?” not me! 🙂
You may remember the stress I had over the fact that these Adel Ikea kitchen cabinets are not a true white, but a creamy white. I couldn’t find plain white subway tile to match them, which is how we ended up with the grey limestone tile (which I LOVVVVVVVE!). Well, in these shots you can see that our white appliances and the Domsjo sink don’t match the cabinets. I didn’t have the budget for new appliances, so I didn’t have to agonize over whether to go stainless or white, but I think that I really like the white appliances in this kitchen, even with the mis-matching whites. More stainless would punch holes in the cabinet runs, if you get what I mean. But I am also really glad we didn’t install white subway tile – because having another white in the kitchen, when I had other options, would have driven me batty!
I also think having that tile around the hood makes the far end of the kitchen recede and the whole thing feels bigger – do you see that too? Or is it just me?
We’re crossing stuff off the list!!!! Soooo close!!!! Andrew started work on the island, and I’ve got new stools with paint drying and newly dyed slipcovers in the washing machine as I type this!
Seal the tileAdd trim to the top of the cabinetsInstall the hoodInstall shelves around hoodInstall backsplash hanging rails- New top and huge drawer for island
- Paint the trim
Caulk! We’re counting on this to hide a bunch of sins!Clean pantry and install new shelves- Lower storage and counter in wet bar
8 Responses
It is gorgeous! I still can’t believe you two were able to do this, on your own, and so quickly! Be proud. Be very, very proud!!!
Just beautiful Candy! The things you think won’t work do and they all have come together so well. I think more color will find its way into the kitchen. 🙂 Enjoy!!
I love it! It turned out wonderful and it’s amazing that you and your husband were able to get this all done yourselves. Hmm, I think that you should buy some of those brightly colored plastic cooking utensils or something to put in those aluminum pails … just for a touch of color, not for use. How do you like the farmhouse sink? Whenever we decide on buying a house in Cheyenne I want one of those in the laundry/mud room so that we can wash our dogs. But I also like the look of it in your kitchen. I’ve never been a fan of the divided sinks that are so popular nowadays.
Candy… It’s been so interesting ‘watching’ your progress thru your on-going posts…! You both have done a massive amount of work and accomplished a wonderful job !!! CONGRATULATIONS ! —Dad. ( : >)
This looks like a professional remodel. So pretty! And functional
I read your comments about Daniel’s countertops on Manhattan-Nest.com so I stopped by to see your kitchen … I love it! And the grey backsplash tile was your second choice? I think it looks wonderful, neutral but textured and distinctve. And yes, it does make that one wall recede a bit.
Yes!I think We’ve had spend a great time using the kitchen.You know how important color is to all of,so it’s looks like a so gorgeous.Really i love it very much.
Just curious, as i’m attempting the hanging Ikea baskets tonight, did you attach the railing to the cabinets or to the tile back-splash? We are weary of attaching to the back-splash (ours is tile as well and the thought of a crack is nerve wracking) and were thinking of attaching to the above cabinets. Hope to hear from you soon!!