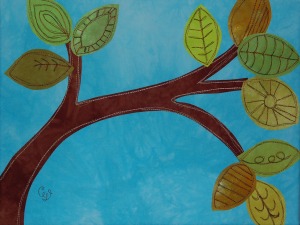
So, my step-sister Pam had a baby recently, a real cutie named Max. Talking to her on the phone shortly after he was born, she could tell I was hinting around at what I should make him and she asked for something to put on his wall. I know she likes the kind of stuff I’ve been doing lately, but still, so many possibilities…
One thing I really like is assembling a larger piece of art out of smaller pieces (if you couldn’t tell), but I was kind of drifting around waiting for inspiration when a PB catalog came, with this image inside – bingo! Love that idea! I’ve also been working with some abstract pieces where I do fun, not necessarily lifelike quilted designs in leaves:


SO, knowing that I get stressed when I’m making a surprise, I decided that it wouldn’t be a surprise – I had Pam & Tommy take a look at all these images and asked them if they’d like this sort of thing – YES, was their answer! Phew! Also, we knew the baby was a boy, and his room is painted a creamy yellow, so that sort of provides some more boundaries. Off I go!
I worked up a general design in EQ6 and printed off the pattern and placed it on my design wall (ahh! lots of tape was involved getting those 30 some pages together!):
I dyed some dark brown, light blue & lots of differnt greens:
Then I traced each tree branch onto some Wonder Under release paper and used an iron to fuse the lines to the back of

brown fabric (this is a great tip I learned from Frieda Andersen). I cut out the branches and pieces of blue fabric 5″ larger than each size rectangle I needed, then folded a 2 1/2″ margin around each blue piece (this part is for wrapping around the stretcher bar). I then lay this all out on my cutting table:
After fusing the branches on, made the quilt sandwich and “sketchy-quilt” outlined the branches. I put the fabric rectangles on my working wall and went to town cutting out & placing leaves. I also made another smaller piece to try out this concept before I began on the large pieces:

I’m so glad I did that, because I realized that doing complex & differnt designs in each leaf for the whole tree would be TOO MUCH! So, I added a little red apple (I quilted Max’s name here), a little red bird for another bit of zing, quilted Pam/ Tommy & Max’s birthdate on 3 of the leaves and the rest I just did some more sketchy outlines.
I LOVED the little birdie I put in the tree, so I made some more little guys to try out differnt quilting styles before getting the one chance to do it on Max’s tree:
Anyway, just got a voice mail from Pam & Max – they love his tree – YAY! Hopefully we’ll have a picture of it installed along with Mr Max himself before not too long!


4 Responses
This is absolutely stunning! Congrats on getting your blog launched, xo Kathy
Oh! That is so lovely!
Max is soo lucky to have an antie like you. With that fabulous growth chart, and this…You are so very talented!